REXsharp Installation in M10: Difference between revisions
From Bitchin100 DocGarden
Jump to navigationJump to search
(Created page with "== REX# Hardware Installation - M10 == To install REX#, you must first de-install any currently installed OPTION ROM software. Follow the instructions provided with that pro...") |
|||
| Line 11: | Line 11: | ||
It should look like this, below. | It should look like this, below. | ||
[[Image: | [[Image:rexsharp_M10.jpg]] | ||
REX is now installed. Replace the cover. You can now power on your laptop, and carry on with the system initialization. | REX is now installed. Replace the cover. You can now power on your laptop, and carry on with the system initialization. | ||
Latest revision as of 11:20, 28 November 2020
REX# Hardware Installation - M10
To install REX#, you must first de-install any currently installed OPTION ROM software. Follow the instructions provided with that product to correctly remove the ROM.
With the power off, flip over your laptop and remove the cover so that you can access the OPTION ROM socket.
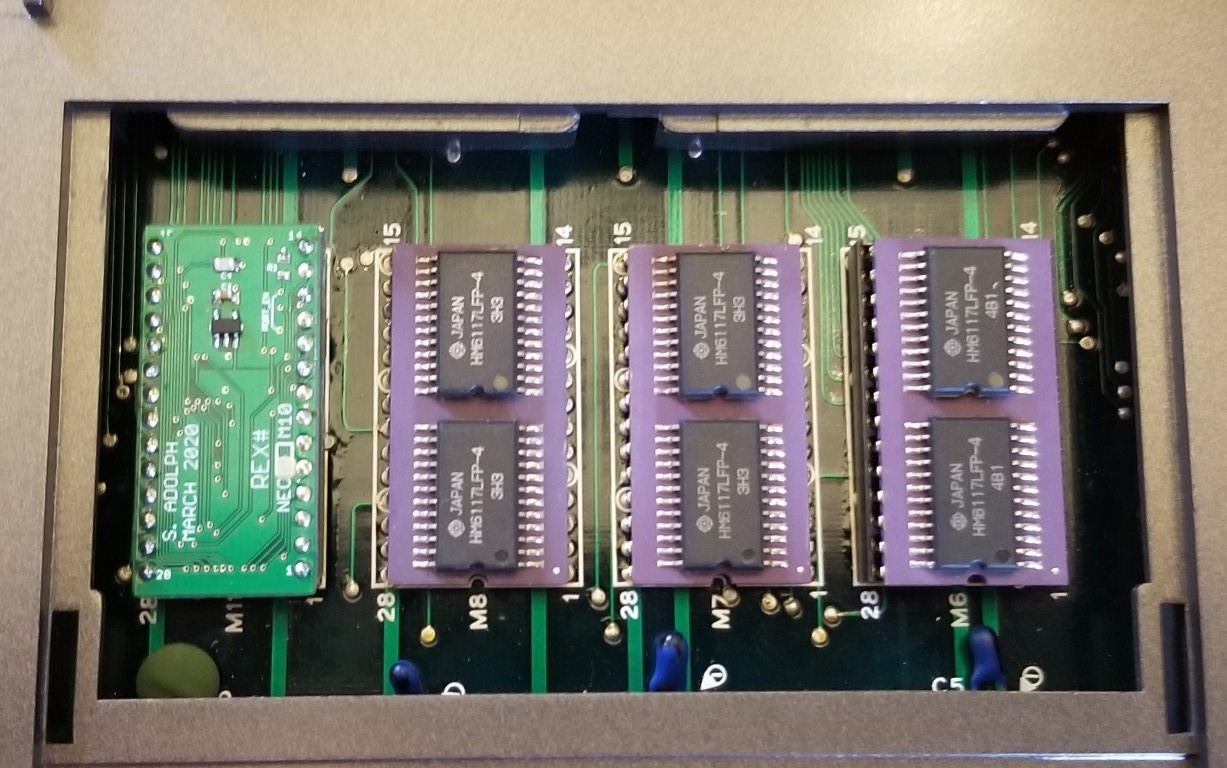
REX# for M10 fits into the standard option rom 28 pin socket. It plugs in like an eprom, so all you need to do is make sure you are oriented correctly.
Gently but firmly press REX into place so that it is fully seated.
It should look like this, below.
REX is now installed. Replace the cover. You can now power on your laptop, and carry on with the system initialization.
