PC-8201 BANK2 32kB SRAM card: Difference between revisions
No edit summary |
No edit summary |
||
| Line 13: | Line 13: | ||
'''PC-8201A''' | '''PC-8201A''' | ||
[[Image:8201A_STOCKs.jpg||left]] | [[Image:8201A_STOCKs.jpg||left]]<br/> | ||
| Line 19: | Line 19: | ||
'''PC-8201''' | '''PC-8201''' | ||
[[Image:8201_STOCKs.jpg||left]] | [[Image:8201_STOCKs.jpg||left]]<br/> | ||
| Line 42: | Line 42: | ||
'''PC-8201A''' | '''PC-8201A''' | ||
[[Image:8201A_SRAMs.jpg||left]] | [[Image:8201A_SRAMs.jpg||left]]<br/> | ||
| Line 48: | Line 48: | ||
'''PC-8201''' | '''PC-8201''' | ||
[[Image:8201_SRAMs.jpg||left]] | [[Image:8201_SRAMs.jpg||left]]<br/> | ||
[[Category:Model T Hardware]] | [[Category:Model T Hardware]] | ||
Revision as of 16:27, 13 July 2021
Add 32kB BANK 2 to your NEC PC-8201 or PC-8201A
NEC originally shipped the PC-8201 / 8201A with only 16kB in Bank 1, but it can support 2 banks of 32kB. These machines use the same SRAM modules as the Model 100, so to upgrade it fully you would need to buy 6 of these modules! Ouch!
This add-on card plugs into the SRAM sockets associated with Bank 2 - RAM 4,5,6 and 7 - and provides a full 32kB in one go!
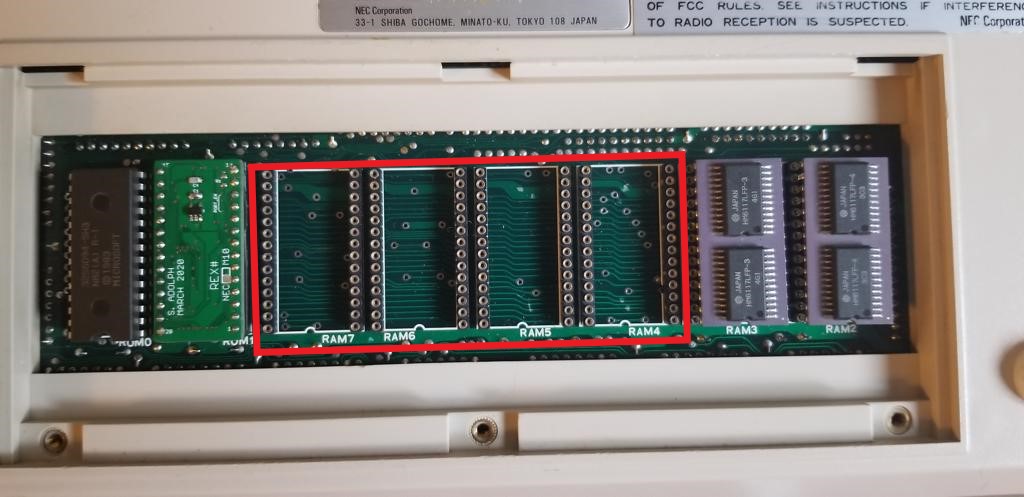
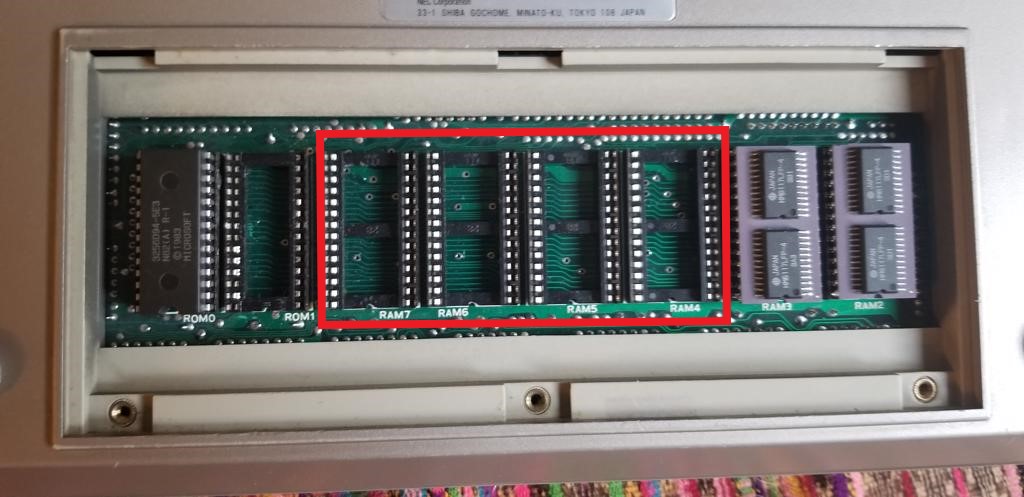
There are two socket styles I have encountered - round pins (most common) or flat pins (less common). These are shown below.
PC-8201A
PC-8201
In these images you can see, as indicated by the red box, where the SRAM module should be placed.
Also shown here - REX# for NEC is installed in the 8201A, in the Option ROM socket, and 8kB SRAM modules are installed in the RAM 2, 3
sockets of Bank 1.
Installation
  1.  For NEC, flip over the laptop and remove the memory compartment cover.
      For M100, remove the 4 screws and separate top from bottom, so you can access the SRAM sockets.
  2.  Align and orient the SRAM card over the sockets.
      For NEC, you are installing a full 32kB in RAM 4,5,6,7.
      For M100,  you are installing 24kB in Option RAM 1,2,3.
  3.  Carefully press the SRAM card until it is fully seated in the sockets.
      Be careful not to bend the pins!
  4.  Reassemble the computer, turn on and run a memory test to confirm the installation is good!
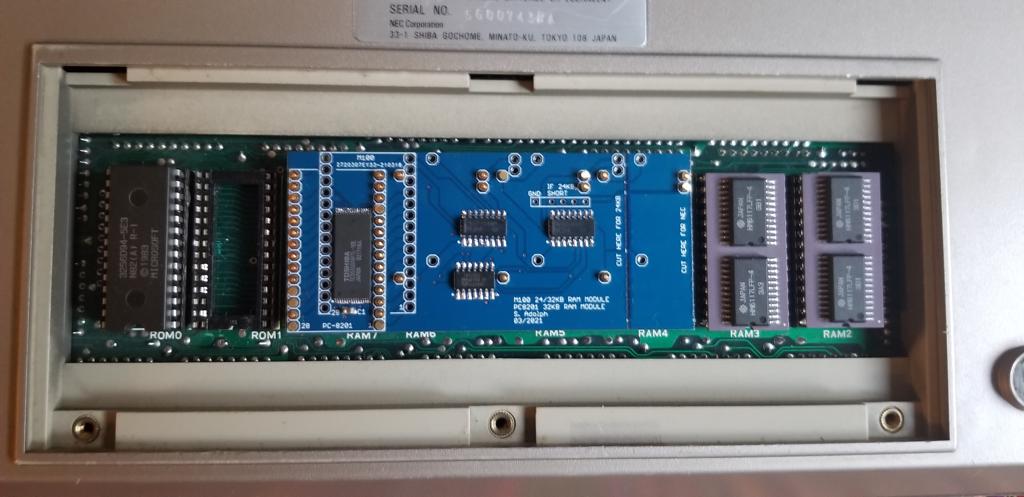
Post-Installation Photos
PC-8201A
PC-8201


