REXsharp Installation in T102
From Bitchin100 DocGarden
Jump to navigationJump to search
REX# Hardware Installation - T102
To install REX#, you must first de-install any currently installed OPTION ROM software. Follow the instructions provided with that product to correctly remove the ROM.
With the power off, flip over your laptop and remove the cover so that you can access the OPTION ROM socket.
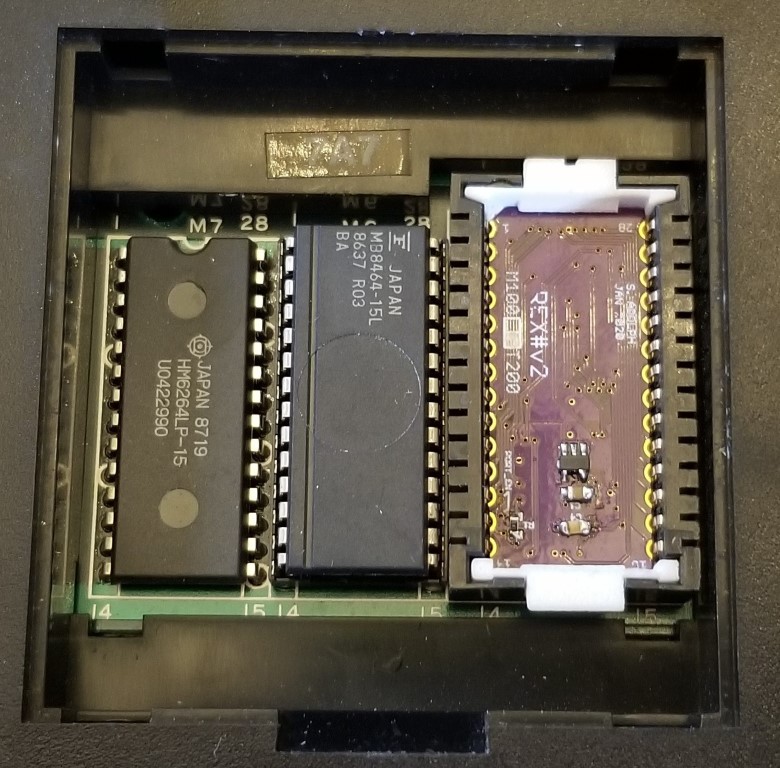
REX# must be inserted in the socket in the correct orientation. REX# comes with a plastic holder that ensures correct orientation in the socket, and good contact with the springs.
Gently but firmly press REX into place so that the plastic holder is fully seated.
It should look like this, below.
REX is now installed. Replace the cover. You can now power on your laptop, and carry on with the system initialization.
